Woah. It's mid-October and by looking at this blog you'd think that I've been on permanent summer vacation. I wish! I've just been lazy. And drinking rosé and eating salads. But now that it's nearly Halloween, it's time to see if my oven still works! Once I remove all of the pot and pans that are stored there!
With all of the recent Instagram posts from pumpkin patches and apple orchards, an apple recipe seemed the way to go. Granted this recipe uses one singular apple, but it's the thought that counts. And BT dubs, if you go to an orchard and only want to bring home an apple vs. a bushel, you'll be good to go!
I randomly have a square muffin tin and it makes these little guys look like cute individual cakes rather than your average muffin. Perhaps along the lines of something that could be sold in an individual package like a Drake's Coffee Cake. The full size, not the junior. (Sometimes I feel like I am living a Seinfeld episode, but I digress…) The point is (what was my point again?) that these are super tasty and my oven still works!

Individual Apple Crumb Cakes
Adapted from Food & Wine
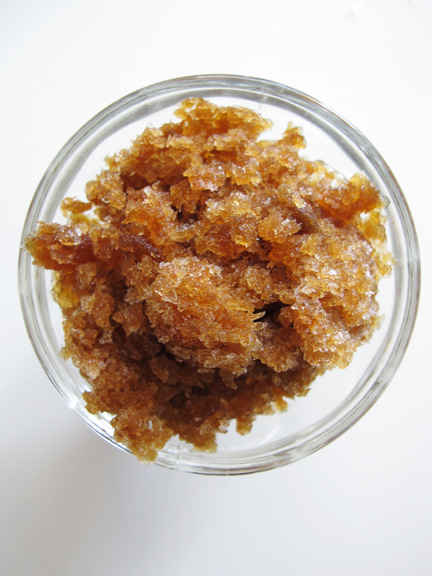
Streusel:
1 cup all-purpose flour
1/2 cup light brown sugar
1/2 teaspoon salt
5 tablespoons cold unsalted butter, cut into small pieces
Cakes:
1 1/2 cups all-purpose flour
1 cup granulated sugar
1 teaspoon salt
1 1/2 teaspoons baking powder
1/2 teaspoon baking soda
1/2 teaspoon ground cinnamon
1 stick cold unsalted butter, cut into small pieces
3/4 cup sour cream
1 large egg, beaten
1 large Granny Smith apple, peeled and finely diced

1. Make the streusel: Preheat the oven to 350°F. In the bowl of a standing mixer fitted with the paddle, or using a pastry blender in a medium bowl, combine the flour with the brown sugar and salt. Add the butter pieces and mix at medium-low speed until the mixture resembles coarse meal. Continue mixing the streusel until very small clumps form. Refrigerate until it is well chilled, about 10 minutes.
2. Make the crumb cakes: Line 12 standard-size muffin cups with paper liners, or simply butter the muffin tin. In a large bowl, combine the flour with the granulated sugar, salt, baking powder, baking soda and cinnamon. Add the butter pieces and cut in with a pastry blender until the mixture resembles coarse meal. Add the sour cream and beaten egg and mix until the batter is smooth. Add the diced apple and stir just until incorporated.
3. Fill the muffin cups halfway with the crumb cake batter. Press the streusel into clumps and sprinkle on top. Bake the crumb cakes in the center of the oven for about 30 minutes, until risen, golden and springy to the touch. Rotate the pans halfway through baking. Let the crumb cakes cool slightly before serving. Makes 12.